Prerequisites:
- You need admin rights on Jira.
- Your Jira instance must be requestable by our server (might require some configuration if your instance is behind a proxy).
1. How to create the Application Link
1.1 Log on to Jira with your admin account.
1.2 Go to Jira settings > Products > Application links.
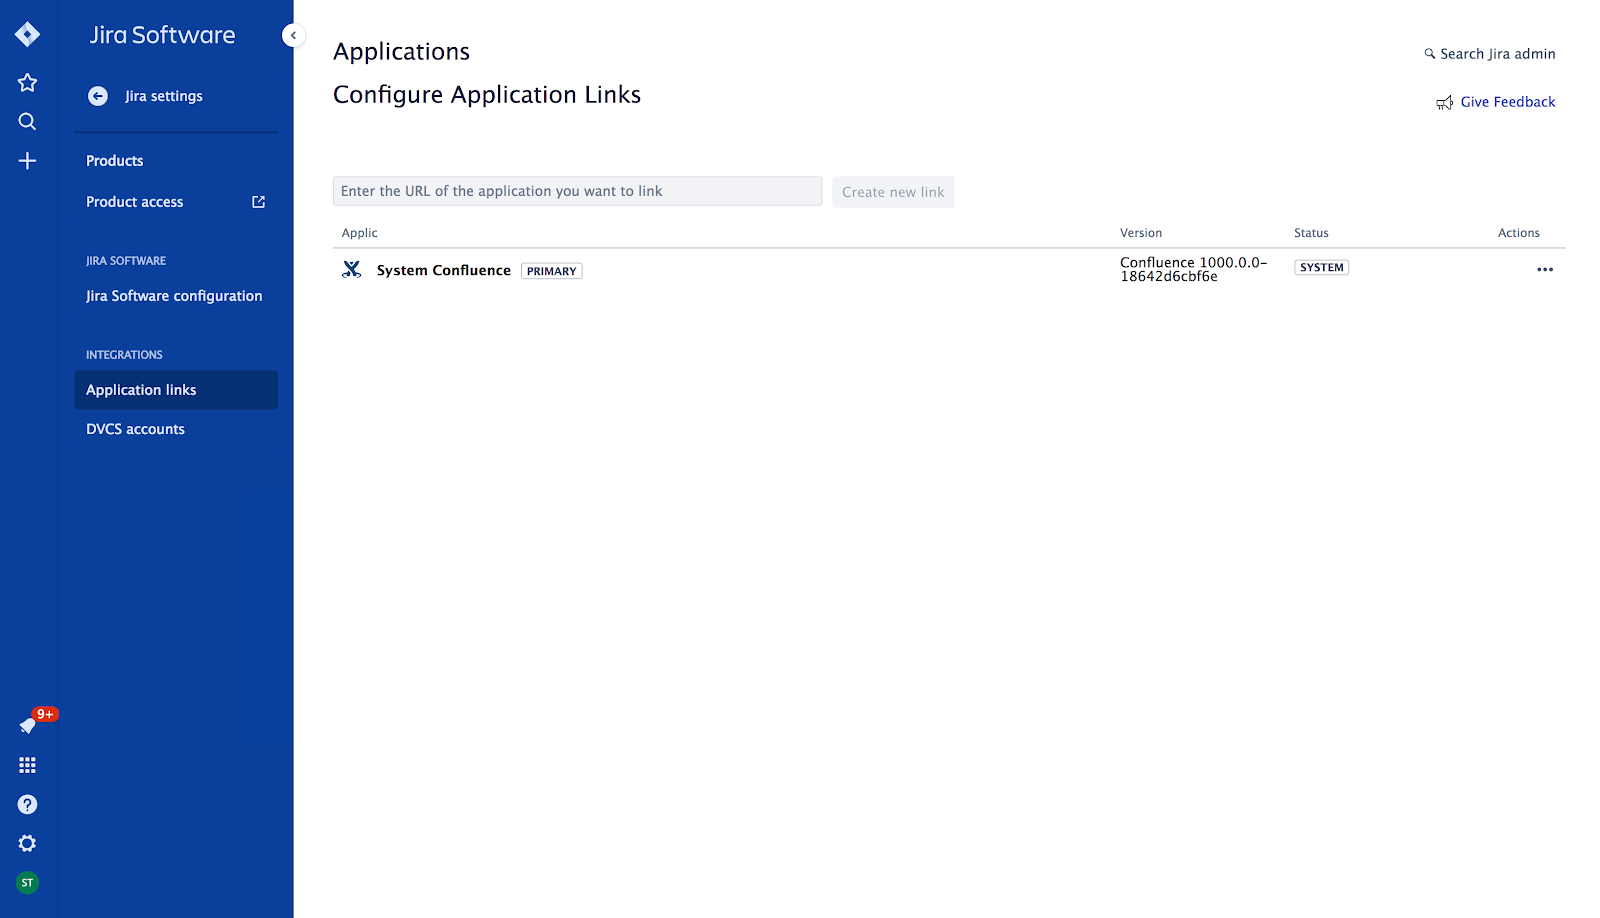
1.3 Type 'https://draft.io' in the text field and, then, click on Create new link.
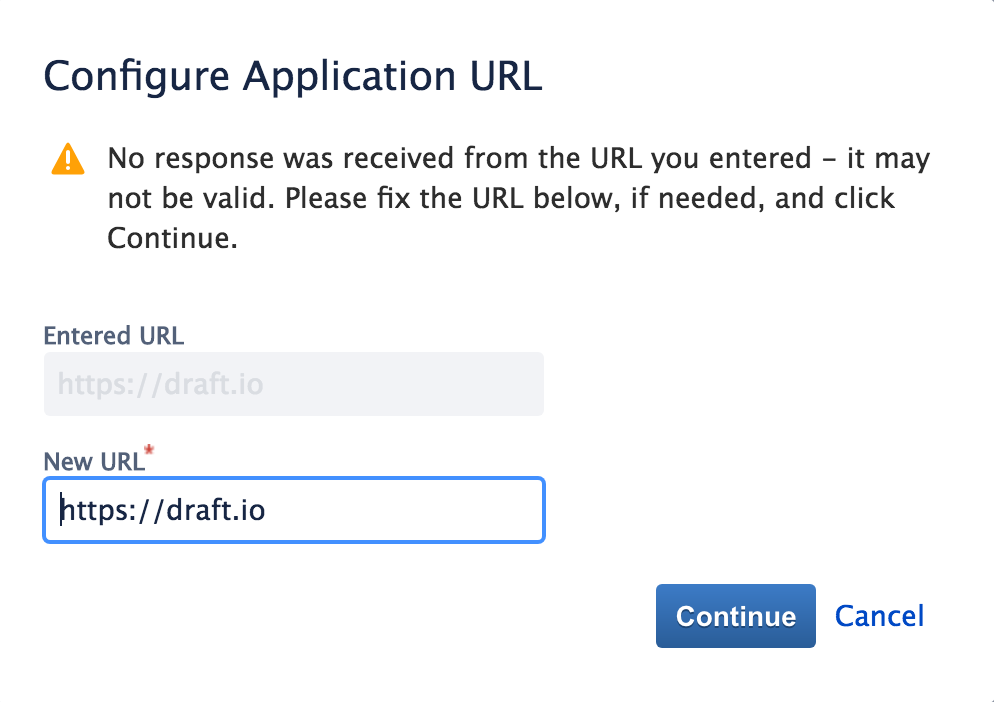
1.4 [Optional]. If a window Configure Application URL pop up, click on Continue **(with New URL = 'https://draft.io'):
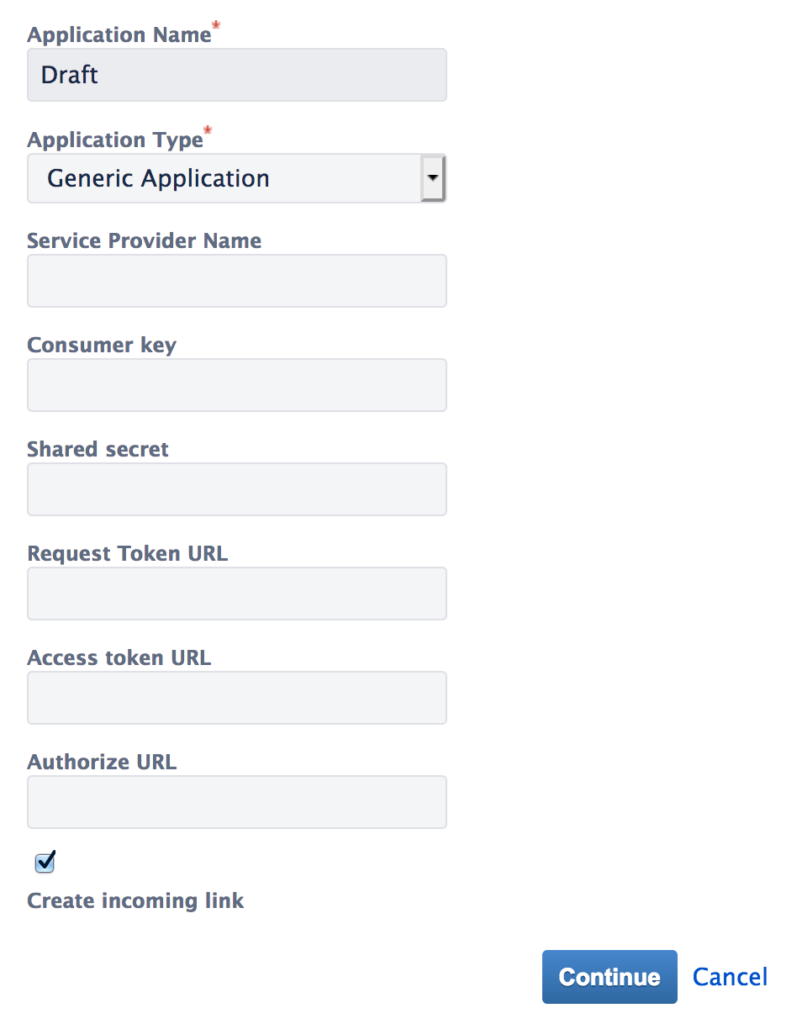
A new form should appear
1.5 Type 'Draft' in the text field Application Name.
1.6 Check the box Create incoming link.
1.7 Then, click on Continue.
A new form should appear.
1.8 Fill the form in like in the example below:
| Consumer Key | GhMrDgeGTCm9 |
| Consumer Name | Draft |
| Public Key | MIGfMA0GCSqGSIb3DQEBAQUAA4GNADCBiQKBgQDEpn6NQWM1efsspCbgzcF5FC+W nRXieW9IOkBlpSFLGDX+1CgEAbVH5+mqvKWjIwE0GcNApX/KbqbdTYEfqp9Pa9G1 51dWRzaIXWricOpWvmgwt8h2C6KpopjCzS7ACJPTZifVktcTIQ+uf8WvyD8coiT8 GnG3H2bFUiGmW+4XMwIDAQAB |
1.9 Then, click on Continue.
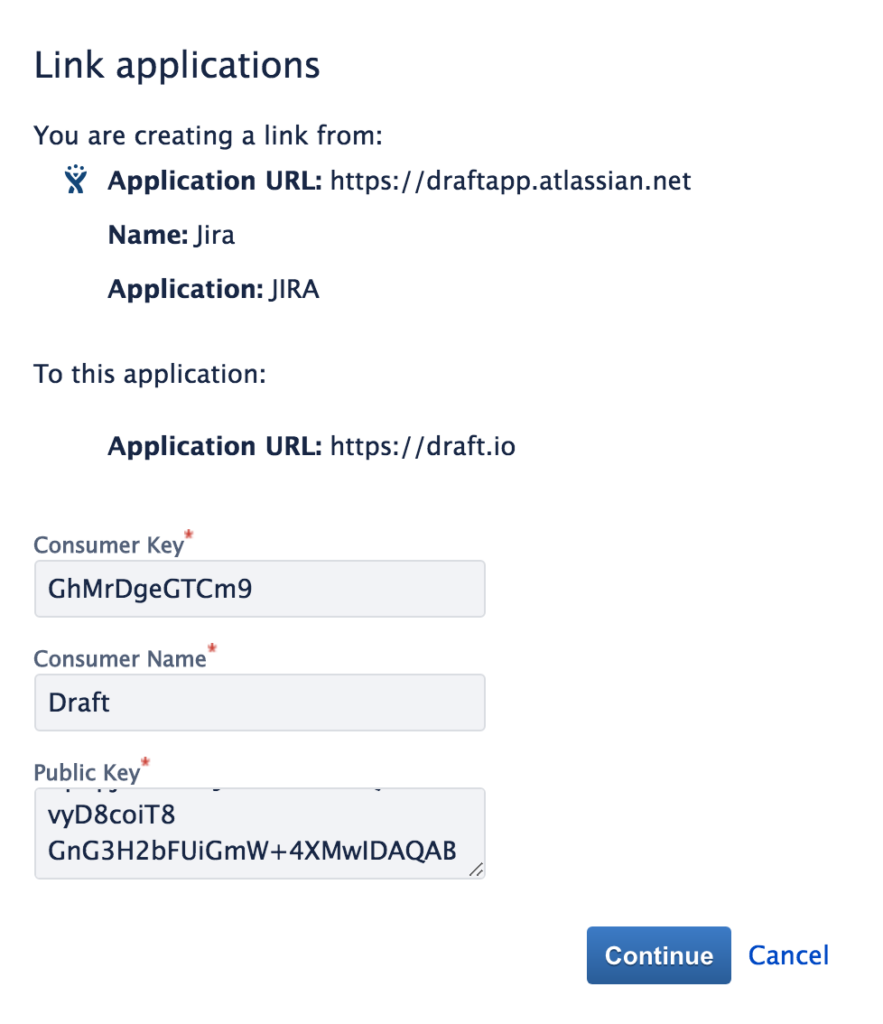
It will create the new Application Link and add it to the list.
2. How to create the webhook (that allows Jira’s real-time sync with Draft.io)
2.1 Go to Settings > System > WebHooks.
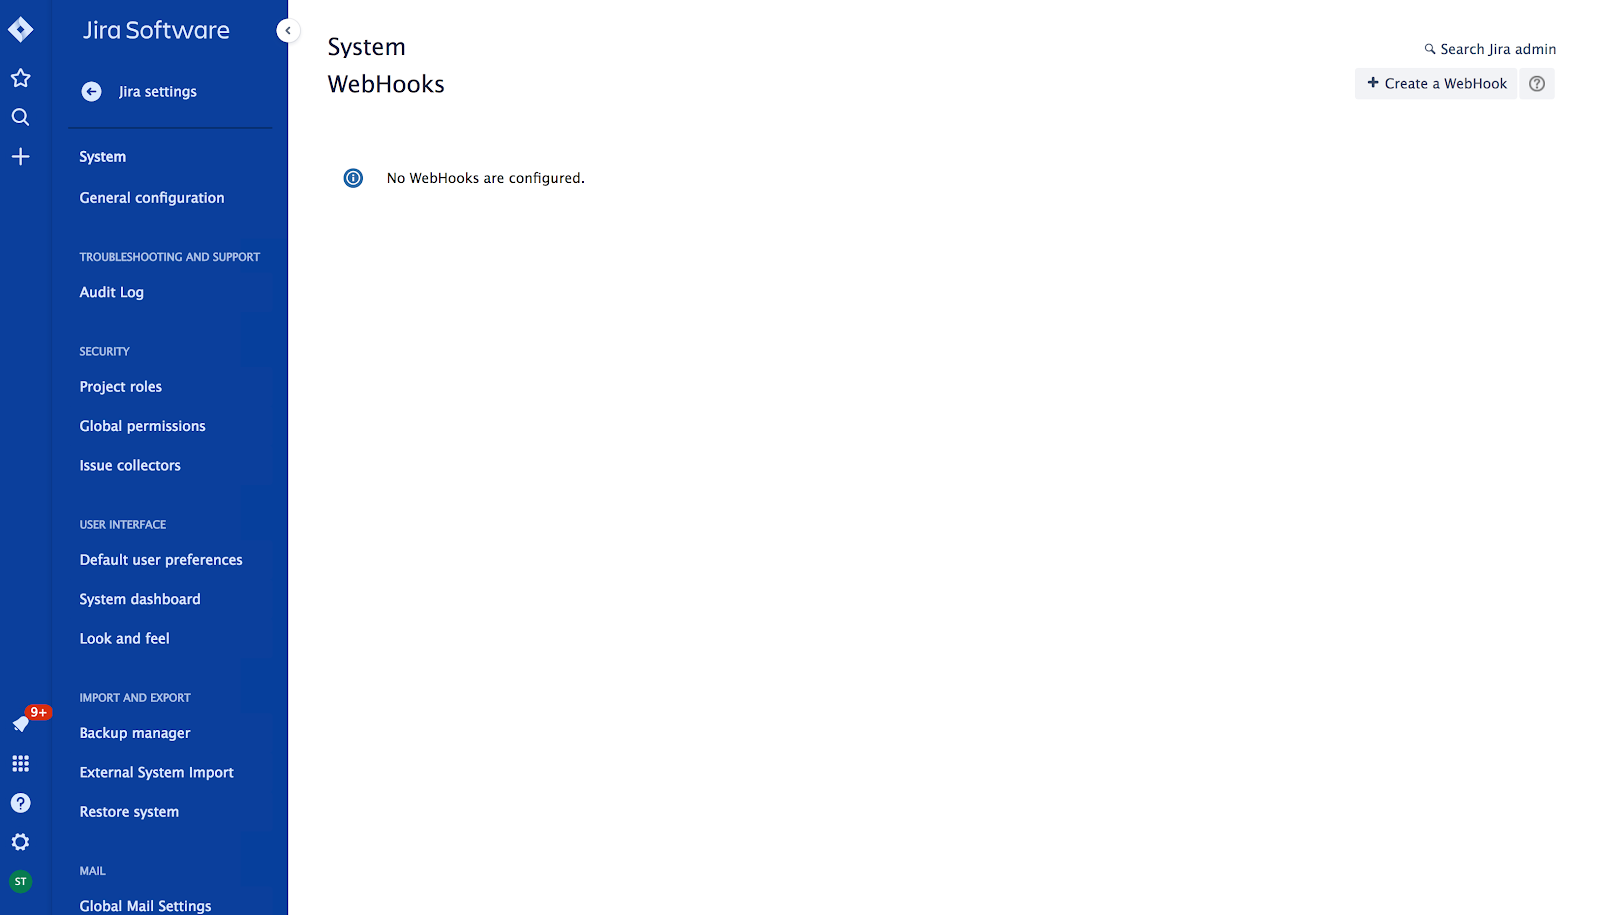
2.2 Go to Create a WebHook (in the upper right corner of your screen).
A new form should appear.
2.3 Type 'Draft' in the text field Name.
2.4 Type 'https://draft.io/api/jira/webhook' in the text field URL.
2.5 In Events > Issue related events, check the 3 boxes created, updated, and deleted within the Issue category (see the example below):
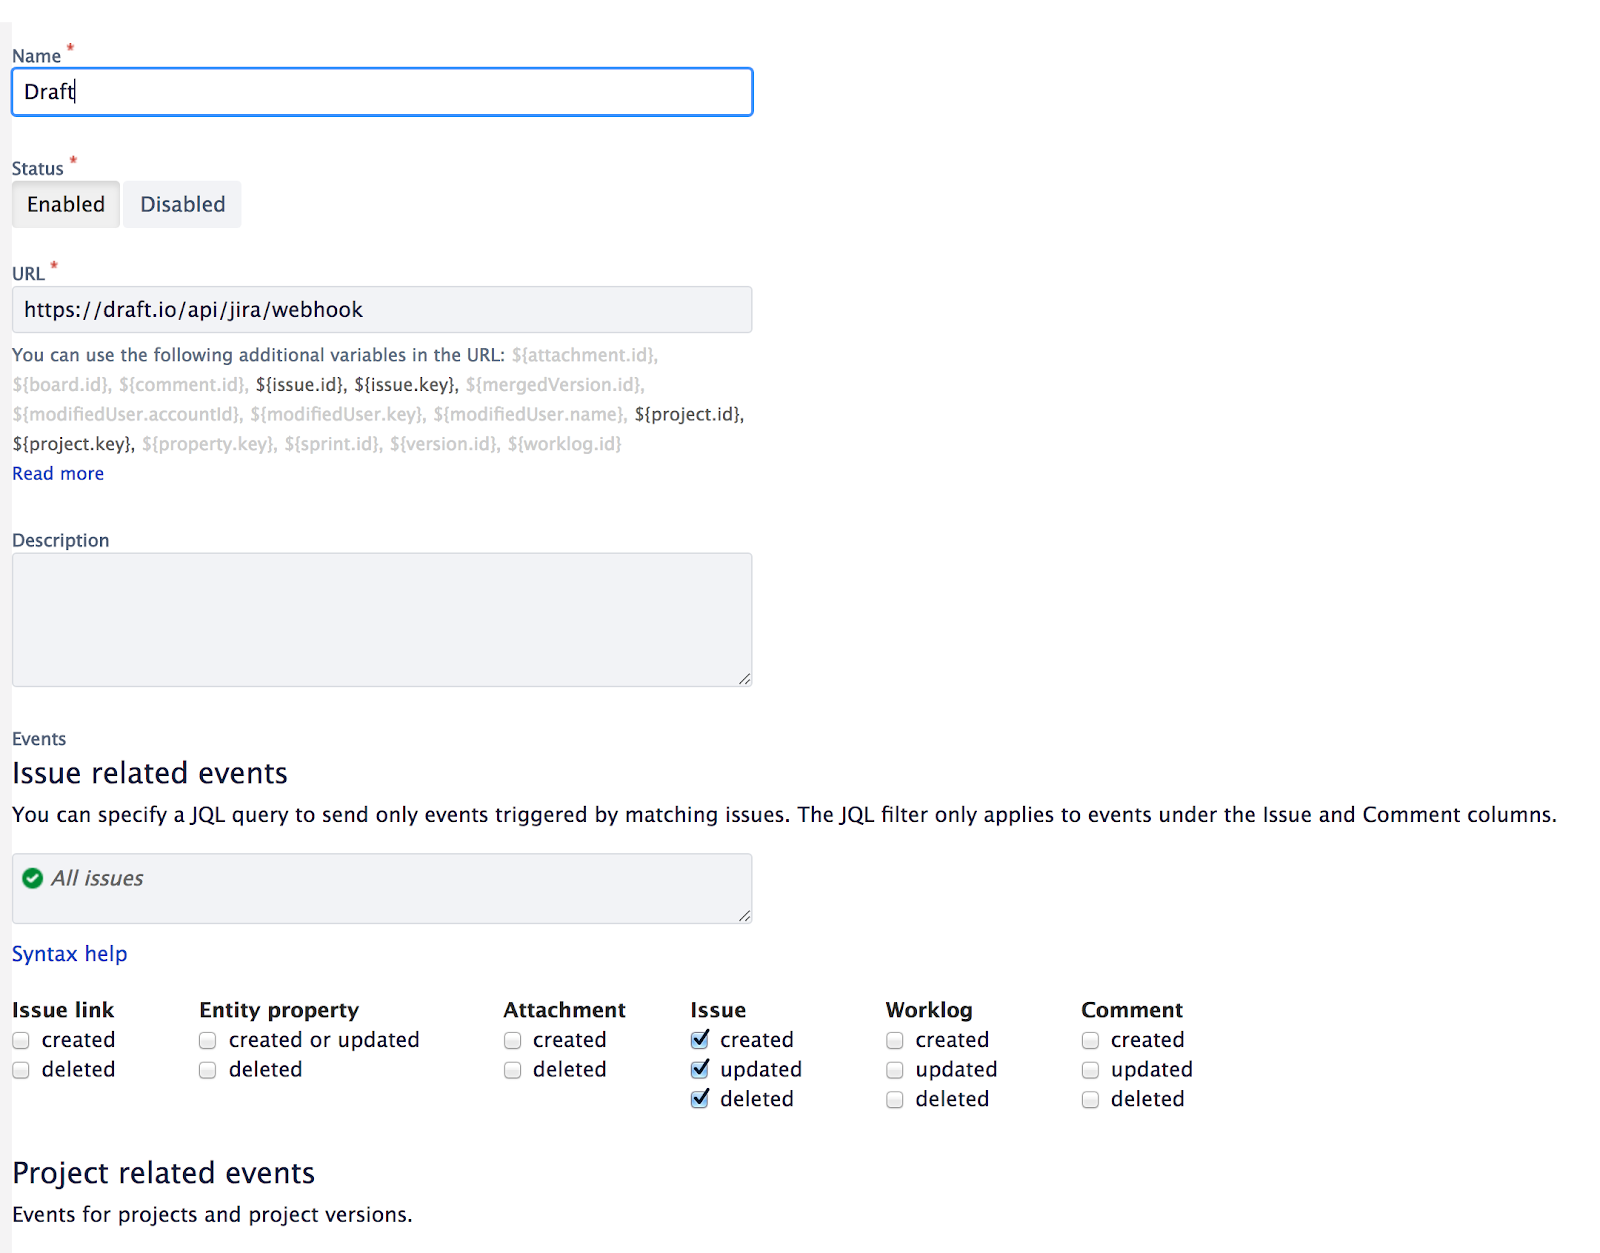
2.6 Please ensure that the form is filled in like in the above example and then click on Create.
It will create the WebHook and add it to the list.